

How Do I Export An Animated Gif From Photoshopcc?
How to Make an Blithe GIF in Photoshop

Adorama
![]()
Adorama ALC
With Adobe Photoshop, you lot can hands create an original animated GIF file (graphics interchange format) from a series of photos. In this tutorial, we'll break down the step-by-step process of how to brand an animated GIF in Photoshop.
1. Select which photos you want to use for your GIF
For the best GIF possible, use a series of images taken in rapid succession. Time lapse images or images shot in burst mode piece of work the all-time. That'south considering they brand your GIF experience like a short looping video. The more frames y'all utilize in your GIF, the smoother the animation effect will exist.
A total of 15-24 all the same images usually piece of work best. Make certain the image size for each of your frames is the aforementioned, so double check the pixel count. Put all of the frames you desire to use in a folder on your desktop or a difficult drive. That will get in easier to find them hands in Photoshop.
2. Import your photos into Adobe Photoshop
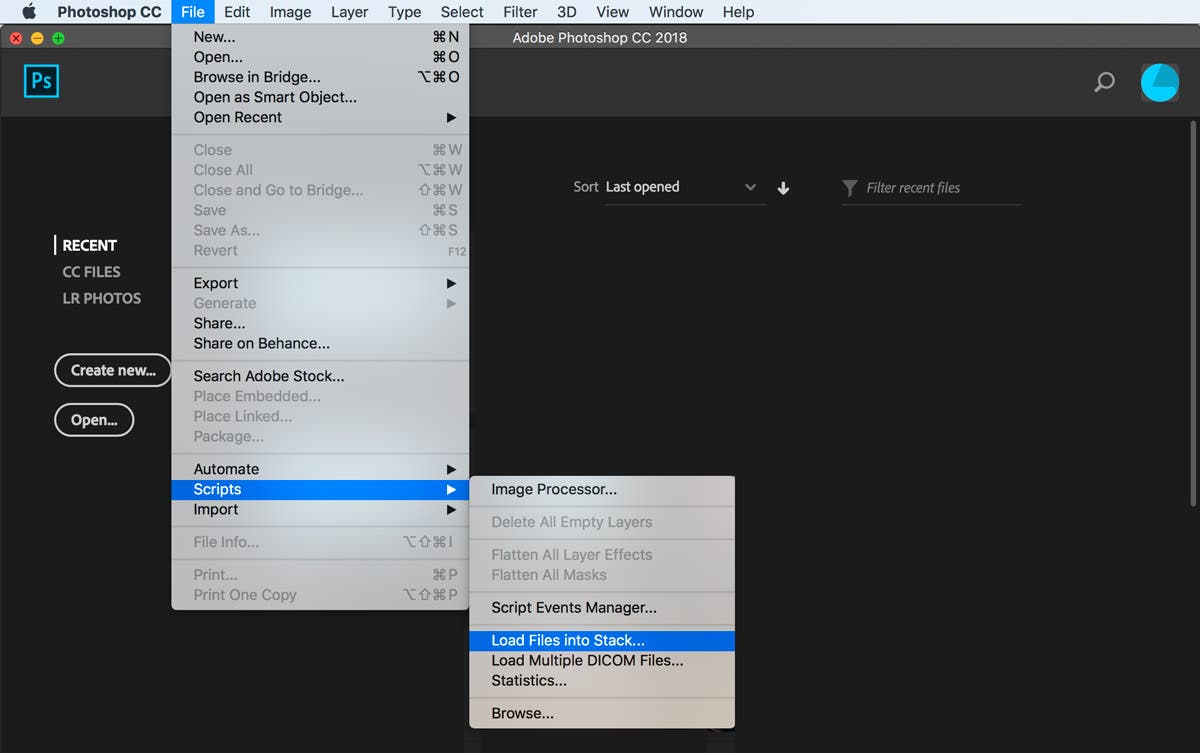
Open Adobe Photoshop. From the File menu, select Scripts > Load Files into Stack. This volition open up a new dialogue box. Click Browse to find the folder you created on your desktop or hard drive that contains the images y'all desire to include in your GIF.
Press the Shift key to select multiple images. In one case all the image files you want to apply are highlighted, click OK. Side by side you'll encounter all the files you selected, listed in the Load Layers dialog box.
Click OK, and Photoshop will then open up the selected images as private layers in a new certificate.
3. Access the Timeline panel
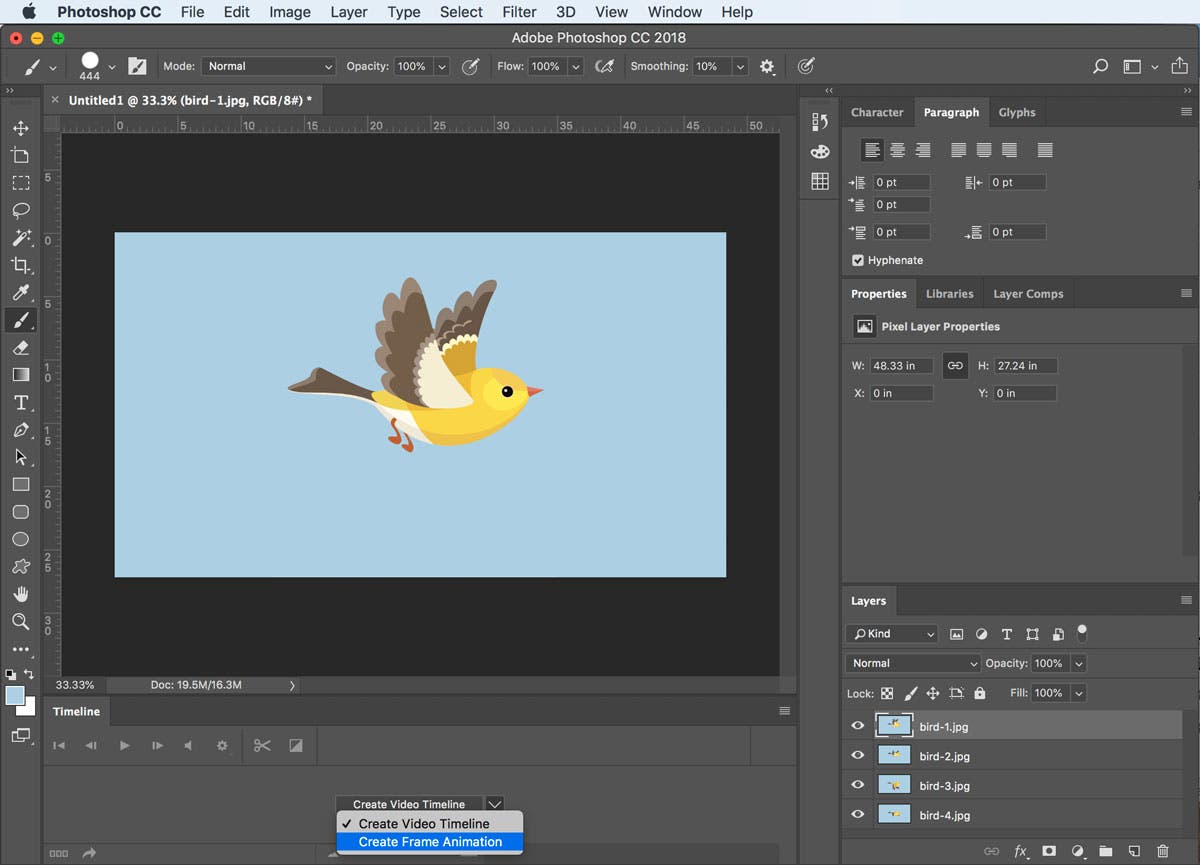
From the Window menu, select Timeline to open the Timeline console in your workspace. By default, the Timeline panel will open at the bottom of your screen.
In the center of the Timeline panel, you lot'll see a button that says Create Video Timeline, with an arrow next to information technology. Click the pointer, and select Create Frame Blitheness from the drop-downward card.
At present the button volition say Create Frame Animation. Click that push button.
4. Convert your image layers into blitheness frames
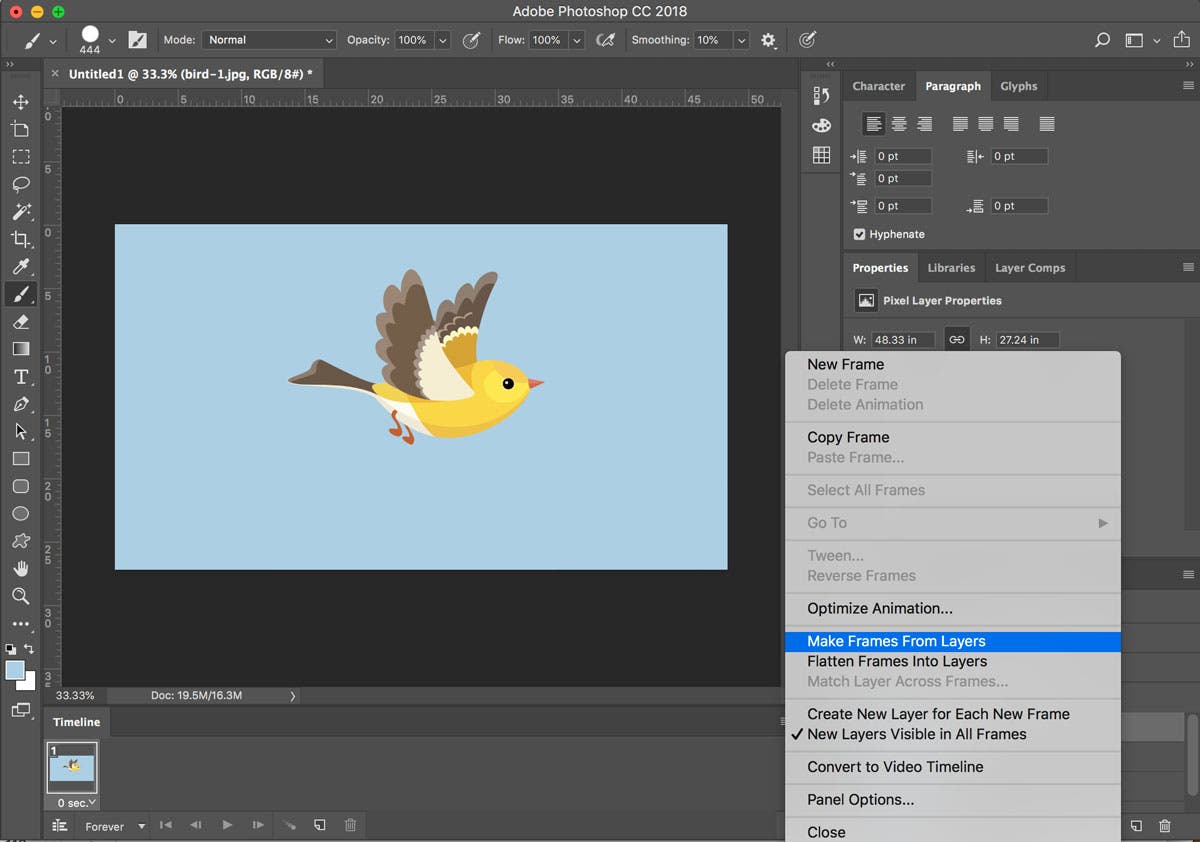
In the superlative right corner of the Timeline panel, you'll see a card icon (four horizontal lines). Click that carte du jour icon to bring up a drop-downwardly menu with animation options.
Click Brand Frames From Layers. This will catechumen the images in the Layers panel into private frames in your GIF.
At present yous should come across a thumbnail of each of your image layers in the Timeline panel. Click the Play button to preview how your GIF blitheness will expect.
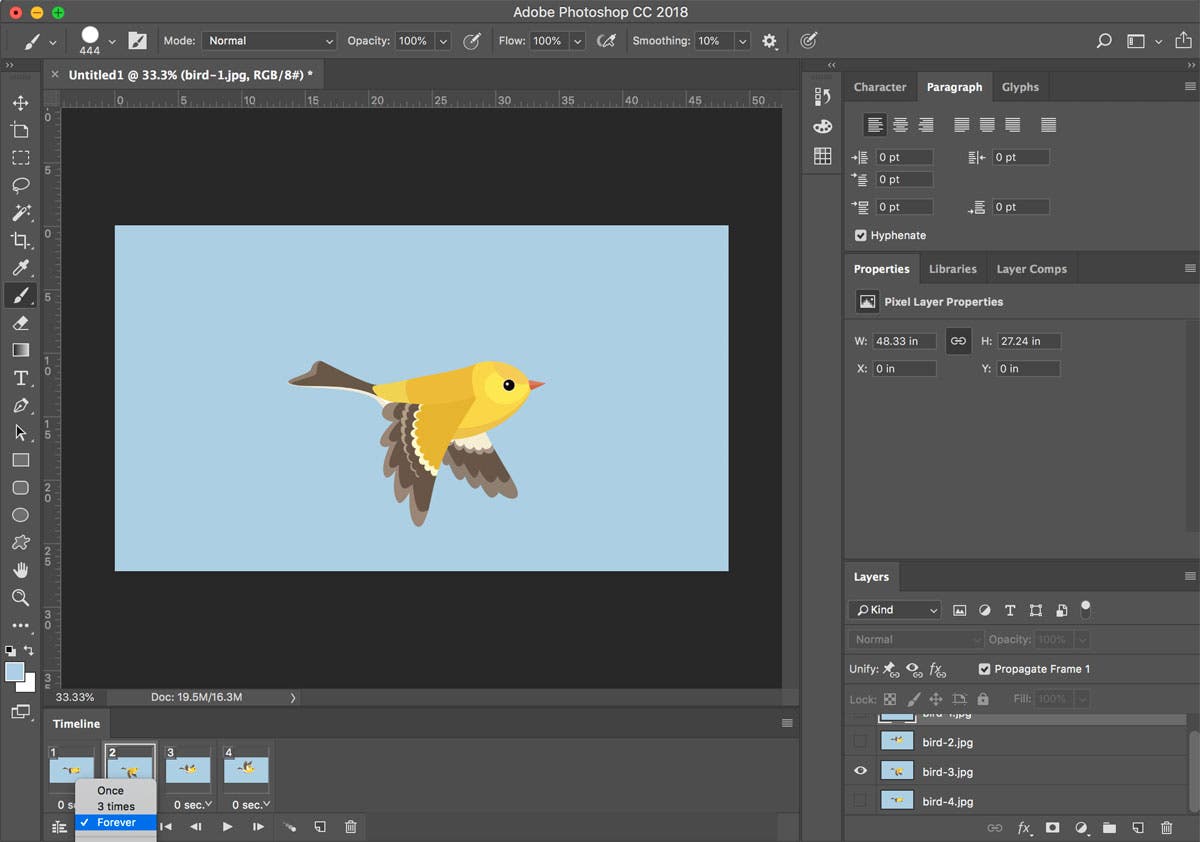
five. Loop your animation
In the bottom left of the Timeline panel, you'll run across a few choices for looping options. Adobe Photoshop lets you lot make up one's mind if y'all want your GIF to play through one time, iii times, or forever. You tin select other looping options manually by selecting Other.
Forever is often selected by default. If one of the other options is selected, click the arrow side by side to the listed duration. And then select Forever from the drop-down menu.
Click the Play icon ane more time to brand sure y'all like how the blithe GIF looks.
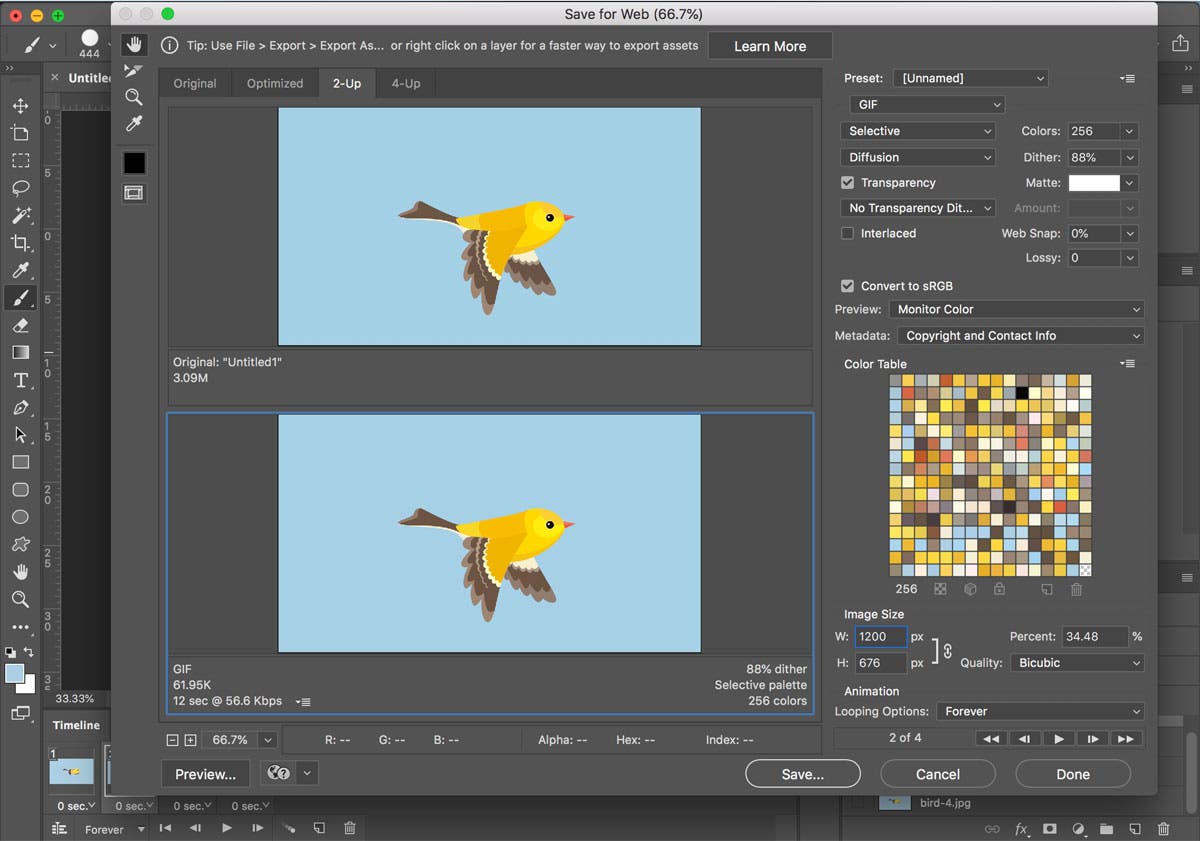
vi. Export your animation as a GIF file
From the File menu, select Consign > Relieve for Web (Legacy). This will bring up a new settings dialogue box. Here are the ideal settings to cull when saving your piece of work in the GIF file format:
- Under Preset, select GIF 128 Dithered.
- In Colors, select 256.
- Under Paradigm Size, y'all can adapt the physical dimensions of your GIF. If your original image files were very large, you should reduce the dimensions of your GIF for better online viewing. As you lot adapt the dimensions, y'all'll come across the estimated file size change in the bottom left corner of the GIF preview.
- Under Looping Options, brand sure Forever is still selected.
Click Preview in the bottom left corner of the dialogue box to see how your GIF volition look in a web browser window.
Click Relieve, which will open a new relieve options dialog box. Name your file, choose a destination, and click Relieve. That's information technology! You've made your own quick and piece of cake GIF in Adobe Photoshop. Now you can upload it to social media, add it to websites, or exercise anything else you want with information technology!
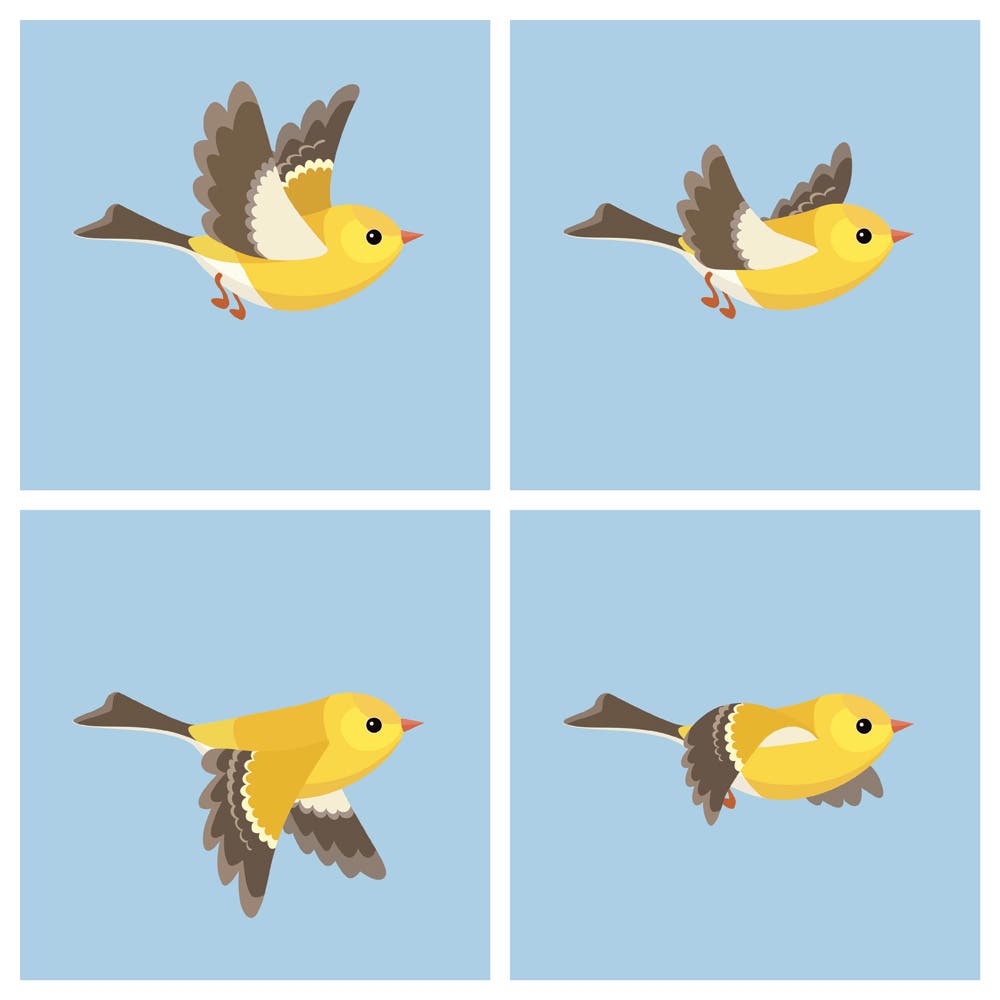
Run into the last GIF:

Desire to acquire more Adobe Photoshop tricks? Check out our other guides:
How to Remove the Background of an Image in Photoshop
half-dozen Adobe Photoshop Tips and Tricks for Beginners
How to Select and Change Colour in Photoshop
How to Lighten and Brighten Eyes in Adobe Photoshop CC

Source: https://www.adorama.com/alc/how-to-make-an-animated-gif-in-photoshop/
Posted by: whiteeatilten.blogspot.com
0 Response to "How Do I Export An Animated Gif From Photoshopcc?"
Post a Comment